setting gbb flags will keep your device in developer mode with option to boot from usb at any time even if your battery runs dry
these flags are usually protected by hardware write protection so you will need to disable it first
in order to set gbb flags you need to enable developer mode on your device
hardware write protection can be dissabled in a few ways
below is a list of known write protection screws/circuts
the circut is located on the motherboard
described in Hardware Maintanance Manual
1. this option like the one above requires you to open up your device
2. disconnect the battery from the mainboard and connect
3. connect the device to a charger
4. turn on your device
as long as the battery is disconnected the write protection should be dissabled on most devices
in order to perform this you will need suzyqcable to, buy or make one
- https://www.youtube.com/watch?v=WGsyXlgSxFk
enter console (details)
and check if CCD (Closed Case Debugging) is opened
if it is opened you can skip opening it
but if it isn't run
after last press the device will shutdonw and you will have to enable developer mode again
now running
should show that ccd is open
now plugin suzyqcable to your chromebook or diffrent pc
now check if it works
output
you can disable hardware writeprotection on any linux/chromeos (as long as device gets detected) with
after doing it enable it back just to be safe
The Open state is lost if Cr50 reboots, the device loses power (e.g., battery runs out and AC is not plugged in), or the battery is removed. Note that Cr50 does not reboot when the system reboots; it only reboots if it is updated, the devices loses power, the battery runs out, or it crashes. If you plan on flashing the AP firmware or flashing the EC firmware, it is recommended you modify the capability settings or set a CCD password, so you can reopen the device in the case that you accidentally brick it with bad firmware. The simplest way to do this is to reset to factory settings and enable testlab mode. more
sources :
- https://www.chromium.org/chromium-os/developer-information-for-chrome-os-devices
- https://wiki.mrchromebox.tech/Firmware_Write_Protect#Disabling_WP_on_CR50_Devices_via_CCD
- https://chromium.googlesource.com/chromiumos/docs/+/master/write_protection.md
- https://github.com/jackrosenthal/ec-zephyr-build/blob/master/docs/case_closed_debugging_cr50.md
- https://wiki.mrchromebox.tech/Unbricking
gbb flags set some default behaviour for a chromeook which canl result in it not forgetting being in developer mode and being able to boot from usb devices if the battery runs dry (especially for older chromebooks). as a result you won't lose access to your system in such a case
in order to set gbb flags you need to enable developermode and disable hardware write protection
this is likely due to broken PATH variable
to work around this you can run
your out put should be
and you run
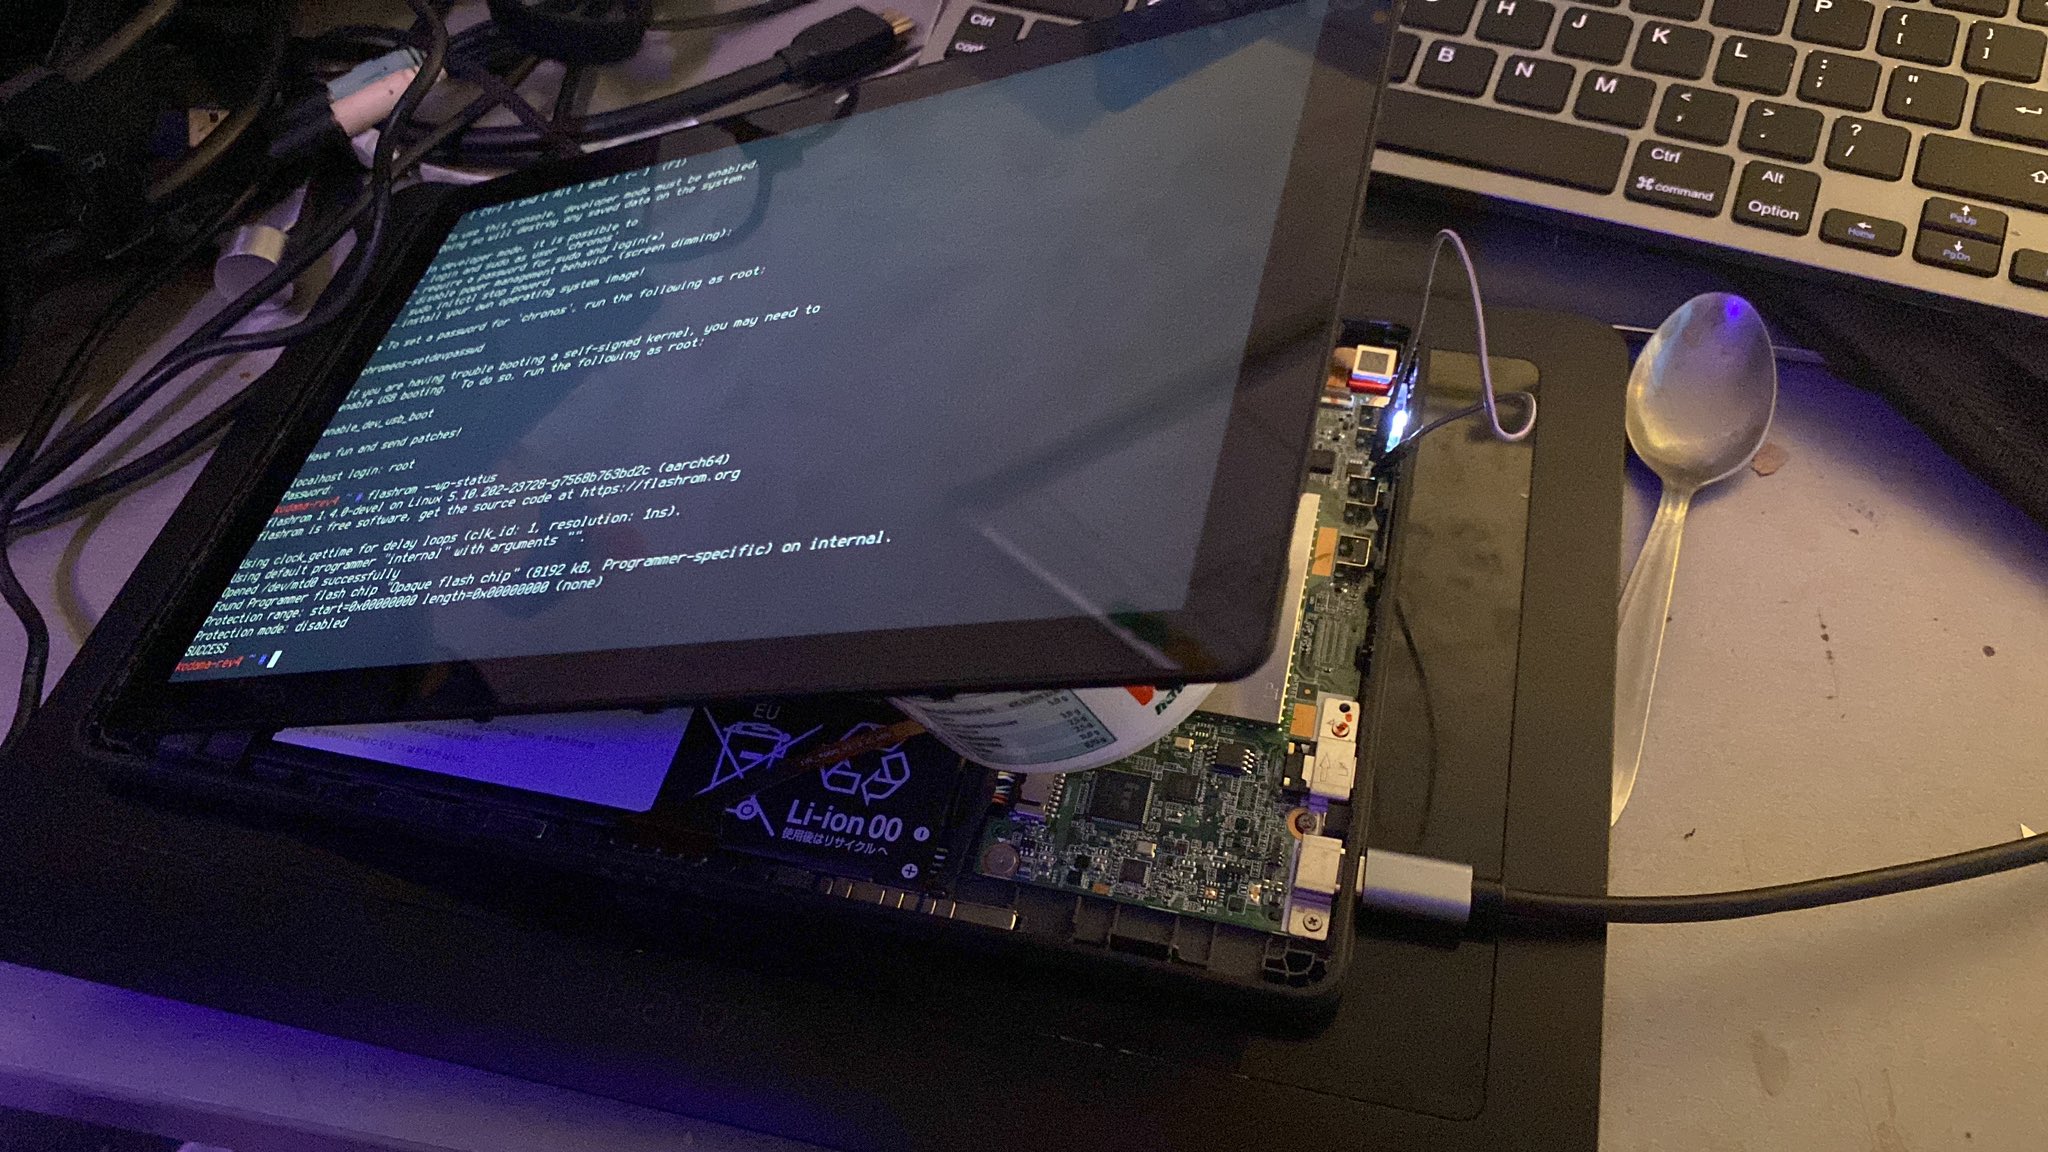
1. start by booting chrome os and entering tty with
2. login with username chronos (no password required)
3. move to directory where
4. check software write protection with
it will probaly be enabled, you can disable it with
read the firmware from the flash into a file
it is a good idea to copy this file to a safe place outside of the chromebook now (sd card, usb stick etc.) to have a copy of the original unmodified firmware around just in case ...
*Note. in case the boot screen should be changed as well, look here it might be a good idea to do this first to avoid resetting the changed gbb settings again then*
*Note. some values may be not supported by all systems*
which combines
- GBB_FLAG_DEV_SCREEN_SHORT_DELAY 0x00000001 - initial boot screen only for 2 seconds instead of the default 30 seconds and no beep afterwards
- GBB_FLAG_FORCE_DEV_SWITCH_ON 0x00000008 - keep developer mode enabled by default
- GBB_FLAG_FORCE_DEV_BOOT_USB 0x00000010 - keep the possibility to boot from usb/sd card enabled by default
5. set the desired gbb flags via the command
on newer chromeos versions (around 112+ or so) one should use
6. check current flags via the command
7. re-enable the software write protection via
- (which seems to happen on newer chromeos versions), then please do the following, see this
1. run the command
2. note down the range for WP_RO - usually it is 0x00000000 to 0x00200000 (or 0x00400000), but better double check
3. then rerun the failed command as (with the range noted down above) - for example
8. re-check the software write protect via
9. if everything looks good, you can shutdown your system now
10. enable hardware write protection with screw or ccd or just leave it open if that is ok
sources :
in respective repos report issues related to html generations, documantation and images